

The first time I reglazed a window in my 1970s split-level, I thought it would be a simple “pop the glass out, smoosh new putty in” kind of Saturday job. It was not. I found ancient, rock-hard glazing, a couple of stubborn glazing points that refused to quit, and more tiny glass slivers than I care to admit.
The good news is this is absolutely a learnable skill, and it is one of those old-school repairs that feels great when you’re done. If you have a wooden, single-pane sash (common in older homes, garages, sheds, and some historic windows), you can safely replace the broken glass and reglaze it so it looks tidy and seals well.

Before you start: is this the right repair?
This guide is for single-pane glass in a wood sash that uses glazing compound (putty) and small metal glazing points to hold the glass. If your window is double-pane (insulated glass unit), cracked tempered glass, or a modern vinyl sash, the repair path is different and usually means ordering a sealed unit or sash parts.
- Good candidate: old wood sash with putty around the glass, glass stops are not used, pane is one layer of glass.
- Not this method: double-pane fogged or cracked unit, metal or vinyl sash with snap-in glazing beads, leaded or stained glass panels.
If your window has broader problems beyond the glass, it may be time for a bigger fix. This checklist can help you decide: 7 signs it’s time to replace your home’s windows.
Safety first (seriously, don’t skip this)
Broken glass and old paint are a rough combo. Plan to work slowly and protect yourself.
Gear I recommend
- Cut-resistant gloves (or leather work gloves at minimum)
- Safety glasses
- Long sleeves
- A shop vacuum with a hose (HEPA is ideal if lead is suspected)
- Thick cardboard or a drop cloth under the sash to catch fragments
Important note about lead paint
If your home was built before 1978, assume there could be lead paint on the sash. Even “gentle” scraping can create lead dust. Keep debris contained, work on a wipeable surface, and use wet methods when you can (a light mist on chips and dust helps keep it from going airborne). Avoid aggressive sanding and avoid using a heat gun that scorches paint. For EPA guidance on lead-safe work practices, see EPA lead information.
Tools and materials
You do not need a fancy kit, but having the right basics makes this job feel controlled instead of chaotic.
Tools
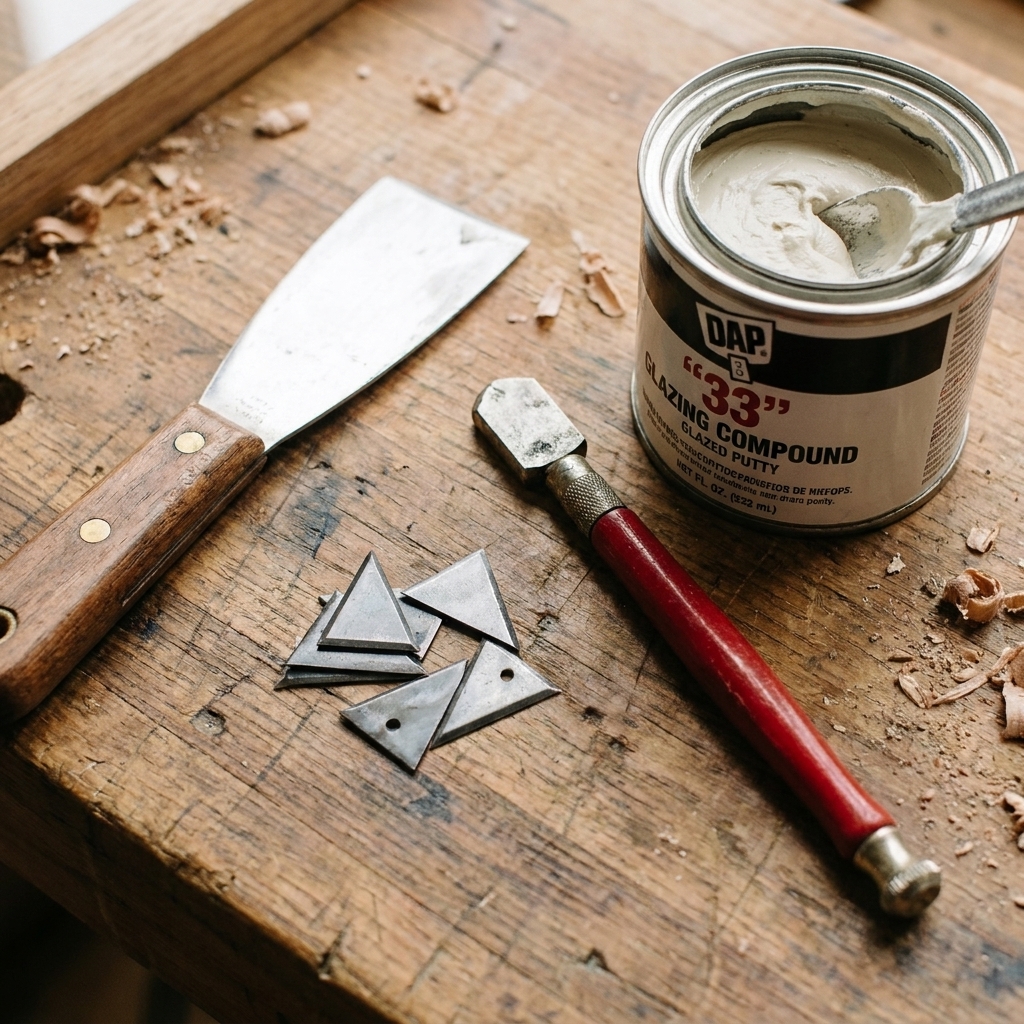
- Putty knife (stiff 1 inch or 1.5 inch is a workhorse)
- Glazing tool or 5-in-1 painter’s tool (optional but handy)
- Needle-nose pliers
- Small flat screwdriver (for stubborn glazing points)
- Utility knife with fresh blades
- Glass cutter (for cutting your own pane) or have glass cut at the store
- Measuring tape and straightedge
- Small paintbrush
Materials
- Replacement glass (match what you have; single-strength is common, often about 3/32 inch)
- Glazing compound (traditional linseed oil putty or a modern glazing compound labeled for wood sashes)
- Glazing points (push points or diamond points)
- Wood consolidant or epoxy (only if the glazing rabbet is rotten)
- Oil-based primer (or the primer recommended by your glazing compound manufacturer)
- Exterior paint for finish coat
Quick note on compounds and paint timing: traditional putty and modern compounds do not always behave the same. Some need to skin over before painting, some want more cure time, and a few are paintable surprisingly fast. Trust the label on the product you bought and follow it.
Tip from my own trial and error: buy extra glazing points. They are cheap, and the old ones often bend or snap when you remove them.
Step 1: Remove the sash (when possible)
Reglazing is easiest with the sash on a bench, laid flat. If you can remove it, do. For a typical double-hung window, that may mean removing interior stops and taking out the bottom sash first. If yours is painted shut or swollen, fix that before forcing anything. This guide helps: How to unstick a painted or swollen double-hung window.
If you truly cannot remove the sash, you can still do this repair in place, but take extra care with glass containment and keeping putty neat.
Step 2: Safely remove broken glass
Contain the shards
If the pane is shattered but still sitting in the frame, I like to apply wide painter’s tape in a crisscross pattern across the glass. It helps hold fragments together as you work. Lay the sash flat if you can, and put cardboard under the work area.
Remove loose pieces first
- Pop out large loose chunks by hand while wearing gloves.
- Use pliers for pieces that are wedged in putty.
- Vacuum frequently. Do not sweep. Sweeping spreads tiny shards.
Keep a sturdy box nearby for disposal. I line mine with a trash bag, label the box “broken glass,” then fold the bag inward when I’m done so the glass is wrapped before it goes out.
Step 3: Remove old glazing and glazing points
This is the most annoying part of the whole job, and it is where patience pays off.
Soften the old putty (optional)
If the glazing is rock hard, you can carefully soften it with gentle heat, but be cautious around old paint. Many people avoid heat guns on old windows for lead and fire reasons. If you do use heat, keep it low and moving, and stop if paint starts to smoke or discolor. Often, careful chipping works fine, just slower.
Chisel it out carefully
- Use a stiff putty knife or painter’s tool to pry the putty away from the glass line.
- Work from multiple angles instead of trying to force one big chunk.
- Do your best not to pry against the glass edge. That is a fast way to chip or crack a pane you were hoping to save.
- Expect stubborn sections near corners.
Pull the glazing points
Glazing points are tiny metal tabs pressed into the wood to hold the glass. Use needle-nose pliers to pull them out. If they are buried, tease them up with a small screwdriver first. Count how many you remove so you reinstall a similar amount.
Step 4: Prep the rabbet (the glass seat)
The rabbet is the little ledge the glass sits on. It needs to be clean, solid, and primed so the new glazing bonds and cures correctly.
Clean and inspect
- Scrape out remaining putty, paint flakes, and grit.
- Vacuum and wipe with a slightly damp rag to pick up fine dust.
- Probe the wood with a screwdriver. If it is soft or crumbly, address rot before you reglaze.
Fix minor rot now (or the repair will not last)
If you have shallow soft spots, a wood consolidant or epoxy repair can rebuild the rabbet. Let it fully cure and sand it flush. If the sash is significantly rotten, the best fix may be sash repair or replacement.
Prime bare wood
Prime the bare rabbet with an oil-based primer (or whatever your glazing compound specifies). This step matters because dry, thirsty wood can pull oils out of traditional putty and make it crack prematurely.
Step 5: Measure and fit the new glass
Accurate sizing prevents stress cracks and makes glazing easier.
How to measure
- Measure the opening width and height in at least two spots.
- Check for out-of-square by comparing measurements. Old sashes can be a little wonky.
- Size the glass so it is slightly smaller than the opening. A common target is about 1/8 inch total smaller (about 1/16 inch per side), but small panes sometimes want less clearance and rough openings sometimes need a touch more. The goal is a pane that drops in without force.
Cutting glass (if you choose to)
If you have never cut glass, it is worth having the hardware store cut it. If you do cut it yourself: use a straightedge, score once with firm, even pressure, and snap along the score line. Do not “saw” back and forth with the cutter.
Dry-fit the pane in the opening. It should sit flat without force. If it binds, trim it or have a new pane cut. Forcing glass into a too-tight opening is a common cause of cracks later.
Step 6: Bed the glass in putty
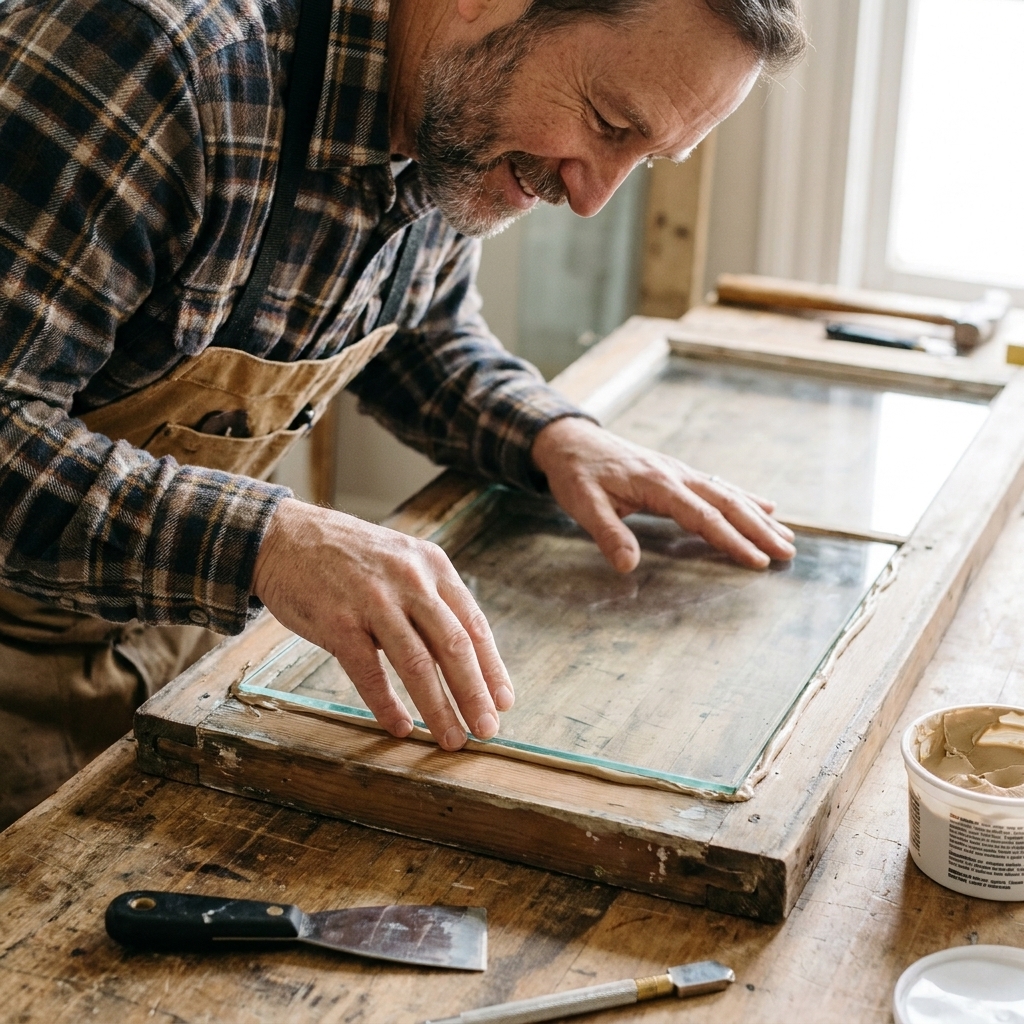
This is the secret to a window that does not rattle and does not leak. You are creating a thin cushion and seal under the glass. You will also hear this called “bedding putty” or “back putty.”
- Knead the glazing compound until it is workable. Traditional putty softens with warmth and hand-kneading.
- Roll a thin rope of putty and press it into the rabbet all the way around.
- Set the glass into the sash and press gently and evenly until it seats. You should see a little putty squeeze-out on the inside. That is good.
- Clean squeeze-out with a putty knife so the inside line looks neat.
Small trick: if your knife is dragging, a very light wipe of mineral spirits on a rag can help smooth things out, but only do this if your compound manufacturer says it is compatible. Some products do not want solvents anywhere near them.
Step 7: Install glazing points
Glazing points hold the glass in place while the putty cures and for the long haul.
- On larger panes, place points roughly every 6 to 8 inches. On small panes, two per side is often plenty. Adjust based on pane size and how securely it sits.
- Push points can often be pressed in with a putty knife. Diamond points may need gentle taps to set them.
- The point should sit flat against the glass, not angled up.
Do not go wild with points, and do not over-drive them. Too many points, or points driven hard at an angle, can create pressure spots. A correct glass fit and gentle, flat points are what keep panes from cracking later.
Step 8: Apply the face putty
This is the part everyone notices from the curb. A clean glazing line makes the whole window look cared for.
Build the bevel
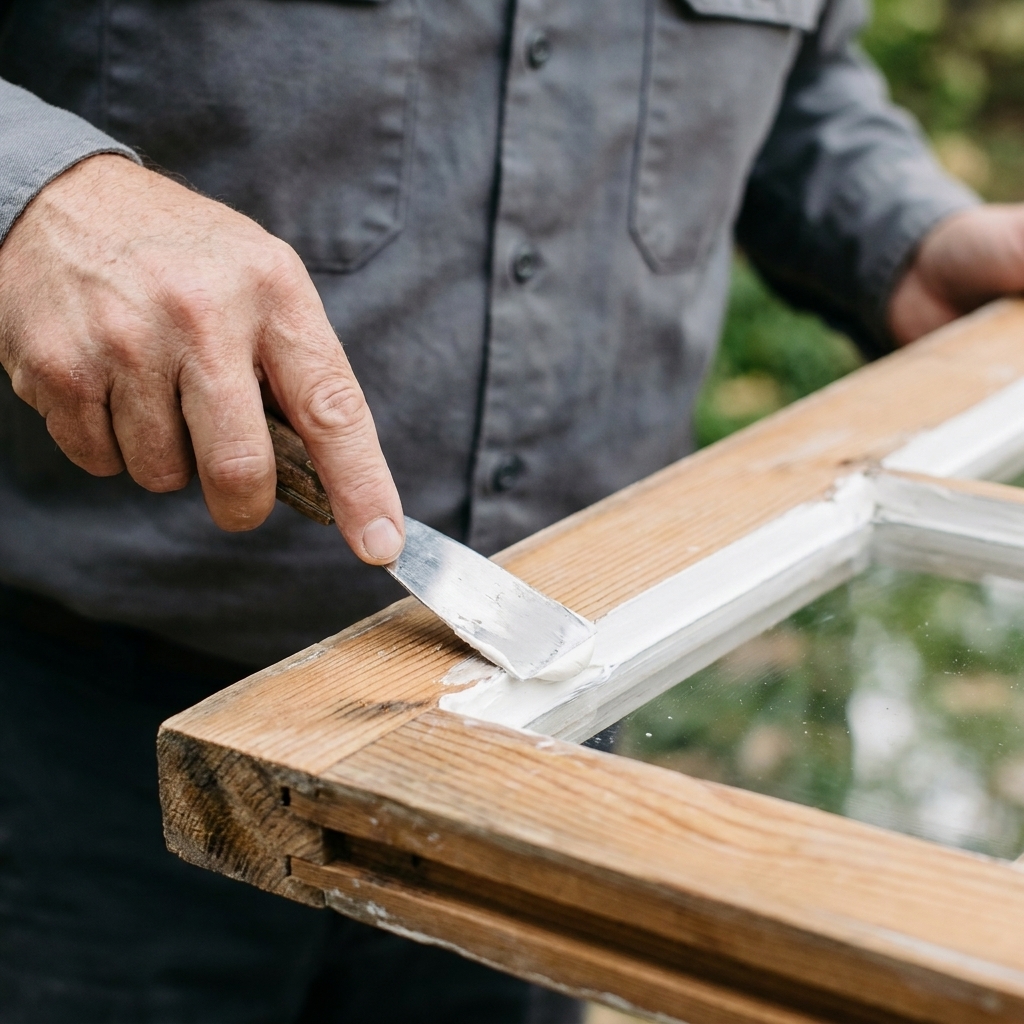
- Roll another rope of putty and press it along the outside edge, covering the points.
- Hold your putty knife at an angle and draw it along the edge to form a smooth bevel.
- Aim for a consistent line that meets the sash at about 45 degrees.
Keep it neat
- Wipe your knife frequently. A dirty knife drags and tears the surface.
- If you get putty on the glass, scrape it off gently with the knife edge.
- Do not obsess over microscopic imperfections. Paint hides a lot, and practice improves your line fast.
Step 9: Let it cure, then paint
Cure time depends on the compound, temperature, and humidity. Some modern compounds paint sooner than traditional putty, and some want a skin to form before you paint. Read the label and follow it.
Why painting matters
Glazing compound is not meant to sit exposed forever. Paint protects it from weather and UV, and it dramatically extends the life of the reglaze.
Paint line rule I swear by
When you paint, overlap the paint from the wood onto the glass by about 1/16 inch. That tiny overlap seals the edge where water likes to sneak in.
Cleanup: get the tiny shards
After the big pieces are gone, it is the micro-shards that get you days later.
- Vacuum the bench, floor, and surrounding area slowly with a hose attachment. If lead is a concern and you have a HEPA vac, use it.
- Wipe surfaces with damp disposable rags or paper towels (especially important if old paint dust is present).
- Wrap all glass waste securely before trashing. A magnet will not help with glass, so do not bother.
If you are working near curtains or blinds, consider cleaning them afterward. Dust and grit can travel. If you have faux wood blinds, this method helps without taking them down: Deep clean faux wood and real wood blinds without taking them down.
Troubleshooting
The putty keeps pulling away or cracking
- Likely cause: unprimed dry wood, compound that dried too fast, or painting too soon for your product.
- Fix: remove failed sections, prime bare wood, and reapply. Also avoid direct hot sun while curing.
The glass rattles
- Likely cause: no bedding putty under the pane or too few points.
- Fix: you may need to reset the pane properly. For minor movement, carefully add points if there is room and the glazing is still workable.
The glazing line looks lumpy
- Likely cause: compound too stiff or knife not cleaned frequently.
- Fix: warm and knead compound more, wipe the knife often, and use longer continuous pulls.
Condensation forms on the inside in winter
Single-pane windows are more prone to sweating, even when they are tight. If moisture is your main issue, this guide breaks down the causes and fixes: Why windows sweat in winter and how to stop it.
When to call a pro
I love DIY, but I also love knowing when I’m about to turn a small repair into a big mess. Consider professional help if:
- The sash is badly rotten or the joints are loose
- The window is part of a historic assembly where matching details matter
- You suspect significant lead paint and cannot contain dust safely
- The broken pane is in a tricky, high location you cannot access safely
If you are weighing contractor quotes for window work, I put together a set of questions I wish I had asked earlier: 10 questions to ask before hiring a window replacement contractor.
Quick checklist
- Protect yourself and contain debris
- Remove loose glass, then old glazing, then glazing points
- Clean, repair rot if needed, and prime bare wood
- Measure correctly and dry-fit the new pane
- Bed the glass in putty
- Install glazing points
- Apply face putty and tool the bevel
- Let cure, then paint with a slight overlap onto glass
Take it slow, keep your hands protected, and do not rush the curing step. A tidy reglaze can last years and makes an old wood window feel solid again.