

I grew up holding the flashlight while my grandpa fixed things “the right way,” which usually meant drilling. Fast-forward to apartment living and then my own fixer-upper, and I learned a different skill: getting curtains up without leaving evidence behind. The good news is you can get real privacy and a finished look without putting a single hole in the wall.

Below are five renter-friendly methods I’ve used (or helped friends use) that actually hold up, plus the small details that keep paint, trim, and security deposits safe.
Before you hang anything: a 60-second window check
Quick checks save a lot of frustration, especially with adhesive options.
- Surface type: Smooth painted drywall and sealed trim work best for adhesives. Textured walls and dusty, chalky paint are where hooks fall off.
- Moisture and heat: Steamy bathrooms and sunny south-facing windows can soften some adhesives over time. Look for strips specifically rated for higher temperatures and humidity, and follow the package guidance.
- Curtain weight: Sheers are forgiving. Blackout panels and lined drapes get heavy fast.
- Mounting goal: Decide if you want inside mount (within the frame) or outside mount (wider than the window to block more light).
- Lease reality check: “No-drill” is not always “no-mark.” If your lease is strict, test your method in an inconspicuous spot first so you know how your paint and trim behave.
If you’re shopping for curtain panels and want them to look intentional (not like they’re hovering), my measuring walkthrough helps: Measure for curtains before you shop.
Method 1: Tension rods (inside the window frame)
If you want the simplest, truly no-damage option, tension rods are hard to beat. They wedge between the two sides of your window jamb using spring pressure.
Best for
- Café curtains, lightweight panels, sheers
- Privacy in kitchens and bathrooms
- Rentals where you cannot touch the walls
How to do it (so it stays put)
- Measure the inside width of the frame where the rod will sit. Buy a rod whose range comfortably covers that width.
- Clean the contact points with rubbing alcohol and let them dry. This improves grip on painted or glossy trim.
- Extend the rod slightly past the width (about 1/2 to 1 inch), then compress and set it in place.
- Twist to tighten if your rod has a twist-to-lock feature.
Troubleshooting
- Rod slides down: You are asking too much of it. Go lighter fabric, shorten the span, or move to a bracketed method below.
- Paint feels “sticky” when you remove it: That can happen with softer wall paint. Next time, put a thin layer of clear shelf liner or felt pad where the rod contacts the frame.
Method 2: Twist-and-fit no-drill brackets (for a real curtain rod look)
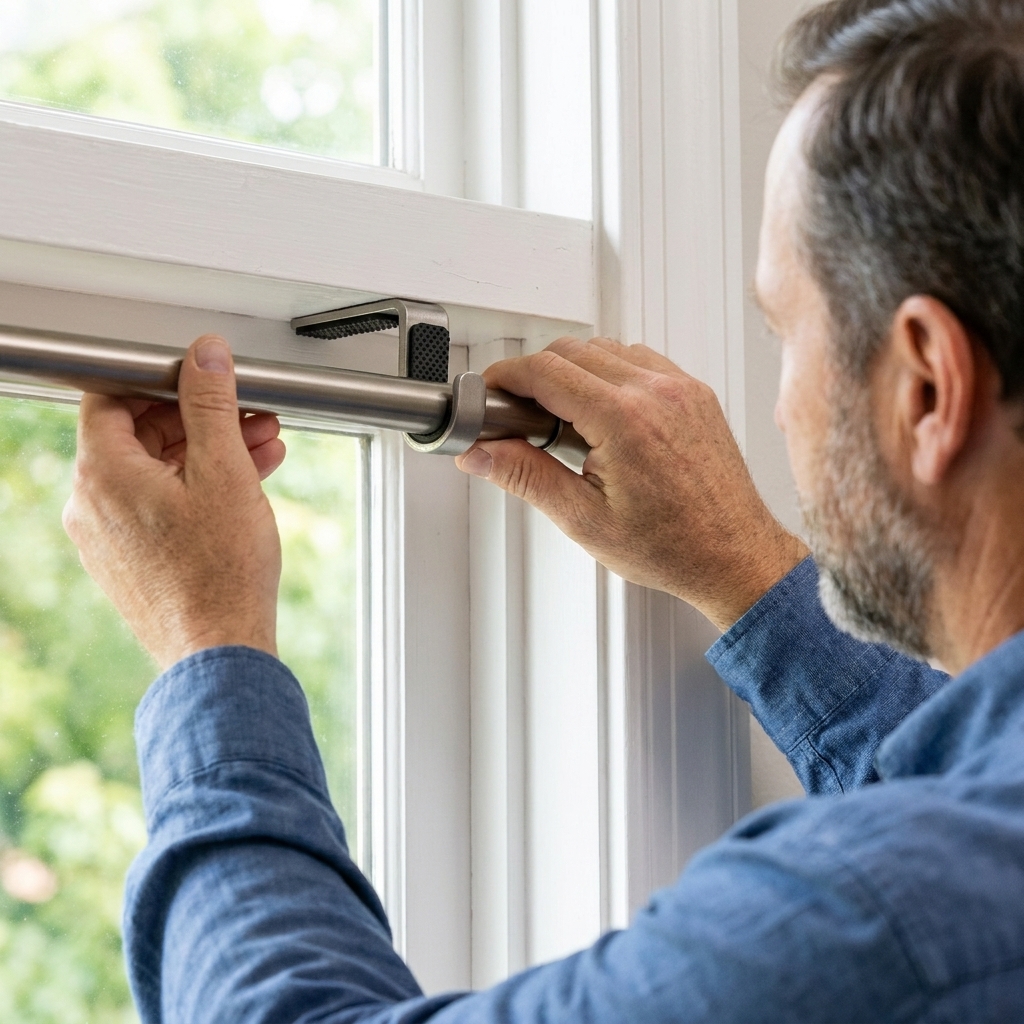
These are tension-style brackets designed to hold a standard curtain rod without screws. Think of them as a hybrid between a tension rod and traditional hardware.
One quick heads-up: different brands brace in different ways. Some press against side jambs, some press against the top trim, and some do a bit of both. Before you buy, make sure your window frame shape gives the bracket two solid, flat surfaces to bite into.
Best for
- Medium-weight curtains where a plain tension rod looks too casual
- Outside-mount style when you still want no holes
How to make them more reliable
- Install into solid surfaces when possible: Window trim is usually sturdier than painted drywall.
- Follow the brand’s width limits: If you’re close to the maximum span, step up to a stronger option like adhesive hooks plus a lighter rod.
- Use a lighter rod: A thin metal rod weighs less than chunky decorative rods and helps the brackets keep their bite.
Tip from too many Saturday re-dos: hang the curtains and then gently tug down on the rod ends. If anything creeps, tighten and reset now, not after you’ve steamed your panels and called it done.
Method 3: Heavy-duty adhesive hooks (outside mount, surprisingly strong)
Done correctly, adhesive hooks can hold curtain rods well enough for many living rooms and bedrooms. Done carelessly, they can peel paint, slide, or drop a rod at 2 a.m. (ask me how I know).
Best for
- Light to medium rods with light to medium curtains
- Outside mount where you want curtains wider than the window
- Renters who want removable hardware
What to buy
- Hooks rated above your load (not “exactly equal”). Remember the rating assumes perfect prep on a compatible surface.
- Rod cradle style hooks made for curtain rods, not tiny utility hooks.
- Adhesive that removes cleanly via a pull tab, when available.
Installation steps that matter
- Clean the wall with isopropyl alcohol. Skip household cleaners that leave residue.
- Stick the hooks and press firmly for the full time in the instructions.
- Wait before loading for at least the time on the package (often 1 to 24 hours, depending on the product, temperature, and humidity). This is where most failures happen.
- Keep the rod level and avoid side-loading. Adhesives hate sideways torque, so do not yank the panels sideways or let kids use the curtains like gym rings.
Removal without paint damage
- Pull the tab slowly straight down (not out from the wall).
- If paint is delicate: Warm the hook gently with a hair dryer first, then pull the tab.
One more sag fix: If your span is long, some setups behave better with a third support in the middle (another hook or a center cradle). It can reduce rod bowing, but it also adds one more point that could mark paint, so only do it if you prep well and you are confident in removal.
If you’re hanging heavy drapes on drywall and you can drill in a non-rental, this guide shows how to do it securely: Hang heavy drapery rods in drywall without a stud.
Method 4: Magnetic curtain rods (steel doors and frames)
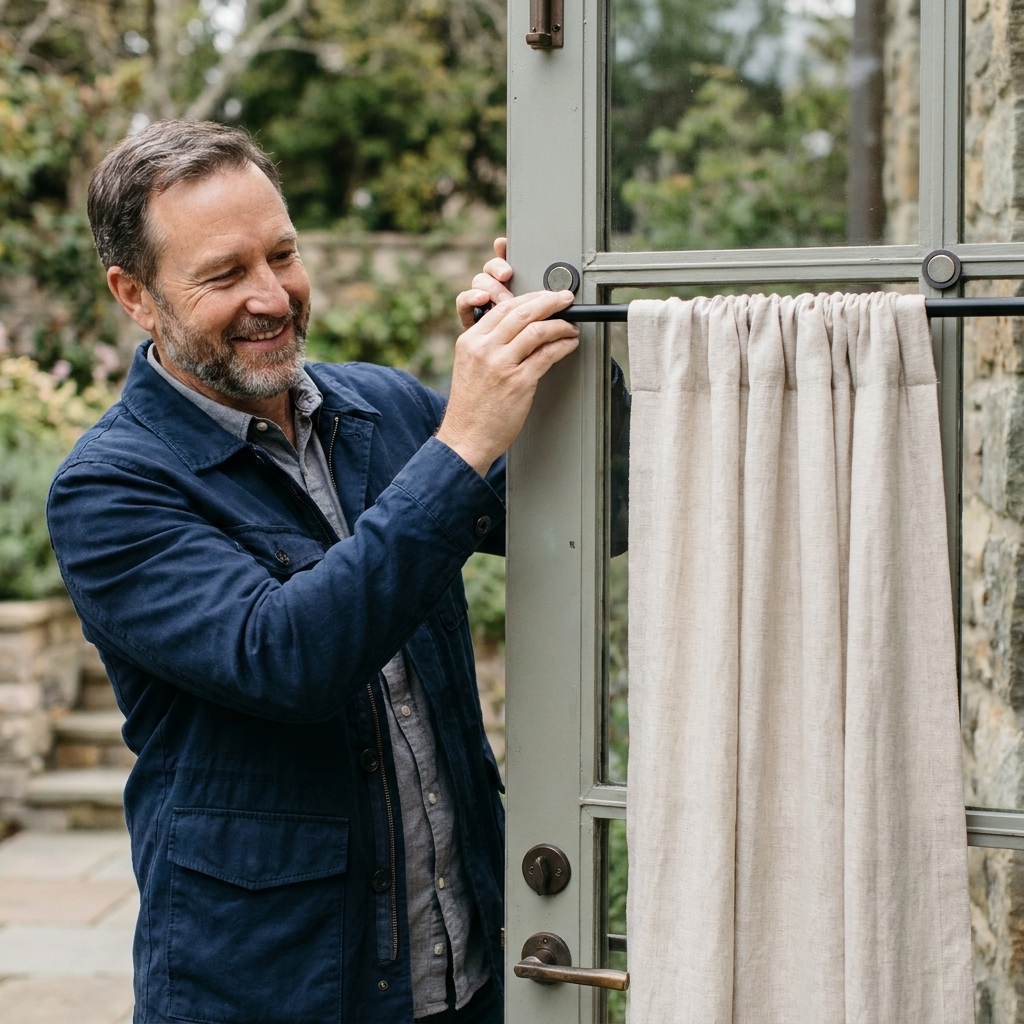
If you have a steel entry door with a window, a steel frame, or certain metal-framed patio doors, magnetic rods are the cleanest solution. No adhesive, no tension, no holes.
Quick reality check: plenty of “metal” frames are aluminum, and magnets will not stick to aluminum. Before you order anything, do a 5-second test with a fridge magnet.
Best for
- Door windows where drilling is a no-go
- Light curtains for privacy
- People who remove curtains often (pets, kids, cleaning)
Tips for better grip
- Clean the metal surface so dust does not reduce hold.
- Add a thin felt pad between magnet and surface if you are worried about scratches.
- Go lighter than you think: Magnets are strong, but doors slam and vibrations add stress.
Method 5: Over-the-frame curtain rod brackets (no-drill, no-adhesive)
These brackets hook over the top of window trim or, on some designs, the window sash, giving you a place to set a small rod. They are one of my favorite “rental hacks” because they are quick to install and remove.
If yours hooks to the sash, treat it like a trial run first. Some windows will not open smoothly with that style in place.
Best for
- Windows with sturdy, squared-off trim
- Light to medium curtains
- Renters who do not want adhesives on paint
What to watch for
- Clearance: Make sure the bracket will not interfere with the window opening and closing.
- Protect the trim: Add a small felt pad anywhere metal touches painted wood.
- Depth matters: If the trim is very thin or very ornate, the hook may not seat correctly.
If your window area is already tricky, like angles or a bay, you may need a different approach entirely. This guide can help you think through the layout: Window treatments for angled bay windows.
Extra tricks for a finished look
Use two layers without hardware drama
A lot of rentals have windows that beg for both privacy and room-darkening. If you want that layered look, you can pair a tension rod (sheer inside mount) with adhesive hooks or twist-and-fit brackets (blackout outside mount). Here’s how I like to layer without overcomplicating it: Layering sheer curtains with blackout drapes.
Stop rod sag before it starts
- Shorten the span: Keep rods closer to the window width when possible.
- Choose grommet-top panels: They slide easier and reduce yanking on the hardware.
- Split the weight: Two narrower panels often behave better than one giant heavy one.
- Add center support when needed: A middle cradle can help on wide windows, as long as you are comfortable with an extra contact point on the wall or trim.
FAQ
Will adhesive hooks pull off paint?
They can, especially on older paint, fresh paint that has not fully cured, or cheap flat paint that chalks. Cleaning the wall first, waiting the full cure time listed on the package, and removing by pulling the tab slowly straight down helps a lot. If your walls are fragile, go with tension or over-the-frame brackets.
Can I hang blackout curtains without drilling?
Sometimes. The trick is reducing stress on the hooks: use a lightweight rod, choose blackout panels that are not overly heavy, and mount the curtains so they glide easily. If you need true hotel-level blackout, drilling into studs or using anchors is the reliable path, but that is not renter-friendly.
What if my window trim is uneven or rounded?
That is where tension rods shine, because they do not rely on a perfect flat wall. If you need outside mount on uneven trim, adhesives can work, but test one hook for a few days before committing to the whole setup.
My quick method cheat sheet
- Fastest, least risk: Tension rod inside the frame.
- Most traditional look without holes: Twist-and-fit brackets with a lightweight rod.
- Most flexible outside mount: Heavy-duty adhesive hooks, installed patiently.
- For steel doors or frames: Magnetic rod (magnet-test first).
- No adhesive, no drilling, outside mount: Over-the-frame brackets (if your trim shape allows).
If you take nothing else from me: match the method to the weight and the surface, and you will get renter-friendly curtains that do not end in a paint repair session the night before move-out.