

The first bay window I ever “treated” was in my 1970s split-level. I walked into the big box store feeling pretty confident, then I got home and realized bay windows do not play by normal window rules. Angles, multiple panes, trim that is not quite square, and just enough depth differences to make a level look like it is gaslighting you.
The good news: once you understand the geometry, bay windows are actually one of the easiest places to make a room look custom. Below is the way I plan it so the angles stop being scary and start being a checklist.
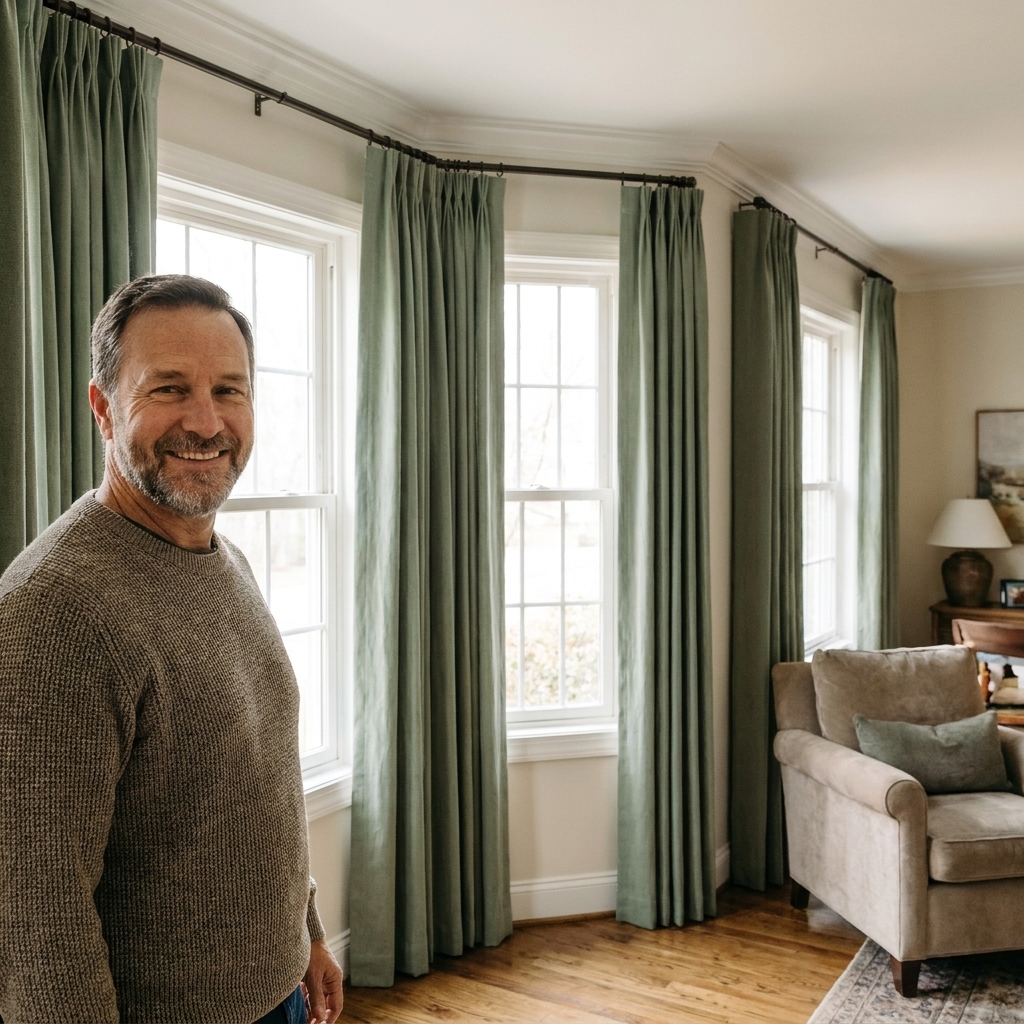
Start by choosing the goal (privacy, light control, insulation, or looks)
Before you pick a product, decide what you need the window treatments to do. This is especially important in a bay window because you can mix systems, for example, shades for function plus drapes for softness.
- Privacy all day: top-down bottom-up cellular shades, light-filtering roller shades, or woven wood shades with liners.
- Room-darkening: blackout cellular shades or blackout roller shades (drapes alone usually leak light at the angles).
- Draft help: cellular shades (honeycomb) plus side channels if you can find a good fit. If the bay feels cold, also look at air leaks. My go-to order of operations is sealing first, then insulating. See weatherstripping vs. caulking for drafty windows.
- Make the bay look bigger: drapery on a continuous rod mounted wider than the outer edges, with panels that stack off the glass.
- Easy cleaning and minimal fuss: inside-mount roller shades or faux wood blinds.
Understand your bay type (because hardware depends on it)
Most “angled bay windows” fall into one of these setups:
- Standard angled bay: three windows with two angled side sections.
- Box bay: a flat front with 90-degree returns on each side.
- Bow window: more than three panels, gentler angles, more of a curve.
Why it matters: box bays can sometimes use straight segments with corner connectors more easily. Bows often look best with multiple small shade units or a flexible curtain track designed for curves. True bowed glass is its own beast, but most homeowners are dealing with straight window units set at angles.
Measure like you mean it (the bay-window version)
If you only take one thing from this article, let it be this: measure each window in the bay independently. Do not assume the two angled sides match, and do not assume the top of the trim matches the bottom.
Tools I actually use
- Tape measure (preferably 16 ft or longer)
- Small torpedo level
- Painter’s tape and a pencil
- Stud finder (optional, but nice for drapery hardware)
- Step stool
For curtains and rods (outside mount)
You are measuring for the rod path and the curtain stack.
- Rod height: Typically 4 to 6 inches above the top trim, or just below crown molding if you have it. Higher makes the bay feel taller.
- Rod projection: You want enough clearance so fabric clears handles, cranks, and trim. In bays, this is where people get burned. If you have deep trim or a window seat, a deeper bracket helps.
- Rod segments: Measure each straight run across each window section, then measure where the angles occur. If you are using a continuous rod system, the rod follows those runs.
- Panel width: For a full look, total curtain width should be about 1.5 to 2 times the total span you are covering. In bays, you can cheat a little by using fuller fabric only on the front window if budget is tight.
If you want a deeper measuring primer for drapes, I wrote up my curtain measuring method here: measure for curtains before you shop.
For shades or blinds (inside mount)
For each window section in the bay:
- Width: Measure at the top, middle, and bottom. Use the smallest number.
- Height: Measure left, middle, and right. Use the largest number (so you do not come up short).
- Depth: Measure the usable flat depth inside the jamb where the headrail will sit. Bay window trim profiles sometimes taper, so check depth at the exact top mounting location.
My rule: If the window is even a little out of square, inside mount still works, but you should expect small light gaps at one edge. That is normal. If that will drive you nuts, go outside mount.
Choose a treatment strategy that works with the angles
Option 1: A continuous curtain rod or track (best for a seamless look)
This is the “custom built-in” look most people want. The rod follows the bay’s angles so the curtains can slide around corners.
- Pros: One unified look, easy to open the whole bay, hides mismatched window sizes, great for living rooms.
- Cons: More planning, corner joints can snag if they are cheap, and you must be precise with bracket placement.
What to look for: A bay window rod kit with corner connectors, or a ceiling or wall-mounted traverse track system that can turn corners. If you want curtains that move smoothly across multiple angles, a track usually beats a rod because the carriers glide through corners more reliably.
Option 2: Individual rods per window section (best for simplicity)
Instead of one rod, you mount a rod above each window section. This is common in casual spaces and rentals.
- Pros: Easy DIY, easy to replace one section later, fewer corner headaches.
- Cons: It can look visually chopped up, and you may have small gaps at the angles.
Tip: Use matching hardware and keep rod heights identical across sections so it reads intentional.
Option 3: Individual shades on each window (best for function)
This is my favorite for kitchens, offices, and any room where you need precise light control. Each window gets its own shade, mounted inside the jamb when possible.
- Pros: Clean, modern, easy daily use, great privacy, no corner issues.
- Cons: Can feel a little “flat” without drapes, cords and chains need tidy routing, and multiple shades cost more than one big one.
Best shade types for bays: roller shades, solar shades, and cellular shades. Roman shades can work too, but make sure the stack-up at the top does not block too much glass in shorter side windows.
Option 4: Layered approach (my go-to for living rooms)
For bays that face a street or get harsh afternoon sun, layering is the sweet spot: shades for control plus drapes for softness. You can do inside-mount shades on each section and a continuous rod across the whole bay.
Hardware choices that make bay windows easier
Corner connectors vs. flexible track
- Corner connectors: Good when your bay has clear, crisp angles (two or three corners). The quality varies a lot. The smoother and heavier the connector, the less snagging.
- Flexible track: Better when you have more panels (bow windows) or you want a cleaner look. Tracks can be ceiling mounted, which can be a lifesaver when wall space is tight above the trim.
Brackets and clearance (the part nobody tells you)
Bays often have crank handles, sash locks, or chunky trim that sticks out. If the curtain rod sits too close to the wall, the fabric will catch every time you open it.
- Look for deep-return brackets or extension brackets.
- If you are layering, plan for two mounting planes: shades close to the glass, curtains farther out.
- Check clearance at the worst spot, usually the angled sides where trim meets.
How to install a continuous rod across an angled bay window
This is the cleanest finish, and it is absolutely DIY-friendly if you take your time. I like to do all layout with painter’s tape first, then drill once.
Step 1: Mark your rod height and path
- Use painter’s tape to create a straight reference line above the trim on the main front window.
- Carry that same height to each angled section with a level. In old houses, do not trust trim to be level.
- Stand back and eyeball it. If the ceiling line is more noticeable than the trim line, split the difference so it looks level to the room.
Step 2: Locate bracket positions
- Plan brackets near each end and near each corner joint, following your rod kit instructions.
- Try to hit studs where you can, especially on the front span where fabric weight pulls most.
- If you cannot hit studs, use the correct wall anchors for your wall type and curtain weight.
Step 3: Pre-drill and mount brackets
- Pre-drill to prevent splitting wood trim or wandering screws.
- Mount all brackets loosely first, then tighten once you confirm alignment.
Step 4: Assemble the rod on the floor first
Dry-fit the rod segments and corner connectors on the floor so you understand how everything locks together. If it is a traverse rod or track, make sure carriers are loaded the right direction before you hang it.
Step 5: Hang the rod and test the slide
- Set the rod into brackets.
- Slide rings or carriers through each corner. If it catches, check that the corner connector is fully seated and not twisted.
- Only after it slides smoothly should you fully tighten set screws.
Step 6: Hang curtains and adjust hems
Bay windows exaggerate uneven floors. If you want floor-length panels, expect to tweak hems or use curtain rings that let you micro-adjust height. If you are hemming, hang the curtains for a day before finalizing to let fabric relax.
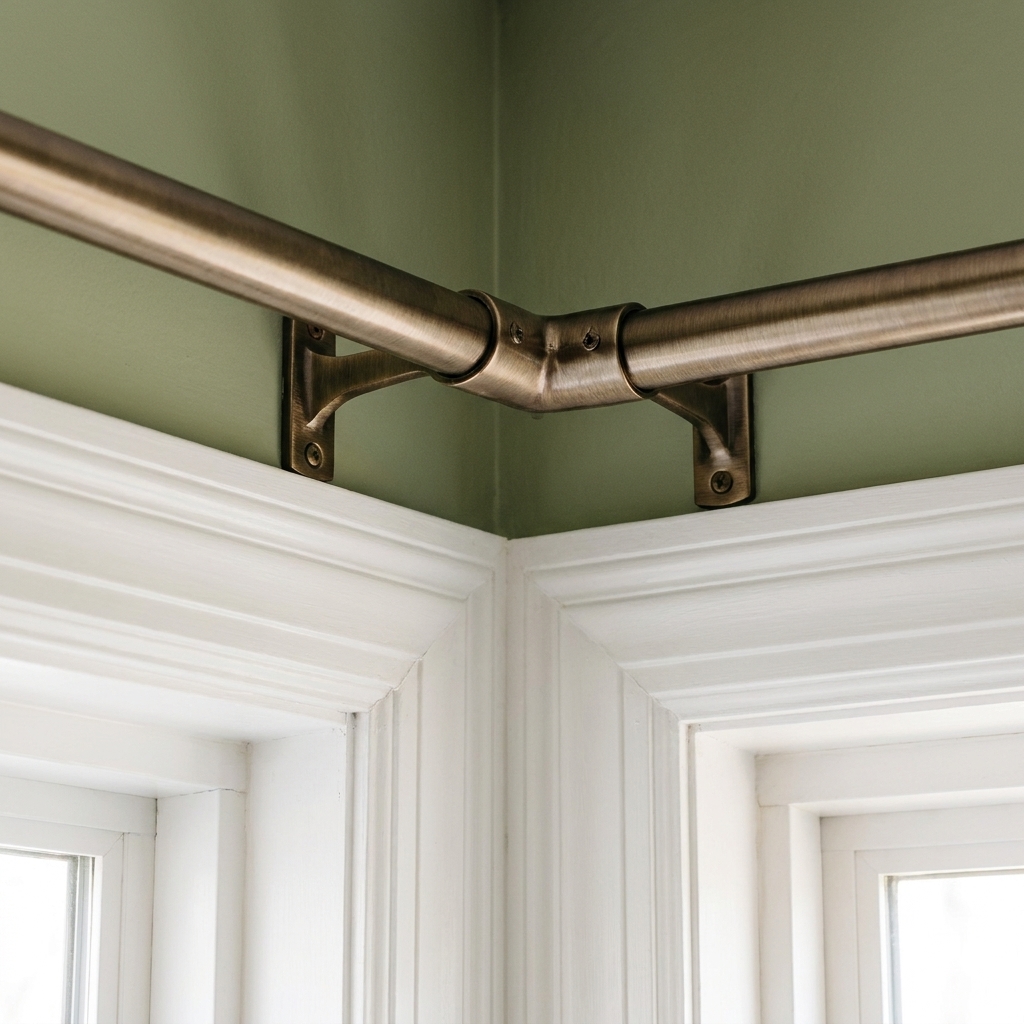
My snag fix (when the corners are sticky)
If rings snag at joints, switching to clip rings with a smooth eye or using a track system usually solves it. Sometimes it is also as simple as moving a bracket 1/4 inch so the joint is not under tension.
How to install individual shades on each bay window section
This approach is cleaner than most people expect, and it is the most predictable install because every shade is square to its own window.
Step 1: Confirm mount type and depth
- Inside mount: clean look, best if you have enough depth.
- Outside mount: best coverage and fewer light gaps, great if trim is shallow or uneven.
Step 2: Mount the brackets level (not “trim level”)
Even if the trim is a little wonky, mount the shade brackets level to gravity. A shade that is not level will drift and rub.
Step 3: Check for obstructions
On angled bay sides, watch for:
- Window cranks and locks
- Alarm sensors
- Deep stops or decorative trim that blocks a flat bracket seat
Step 4: Set the shade and test the travel
Operate each shade fully up and down. If one binds, loosen the brackets and re-seat the headrail. Tiny alignment errors show up big in angled bays because light hits from multiple directions.

Safety note for cords
If your shades have cords or chains, follow the manufacturer’s child-safety setup and keep tension devices anchored. Bays are common in family rooms and play spaces, so it is worth doing right.
Special situations: window seats, radiators, and tricky trim
Bay window with a seat
Window seats are great until you realize long curtains land right on your favorite sitting spot.
- If you want drapes: consider apron length (ending just below the stool or seat) or mount panels to the sides as stationary decor with functional shades for privacy.
- If you want function: inside-mount shades keep the seat usable and uncluttered.
Bay window near a radiator or heat register
Heat can warp cheaper vinyl blinds and dry out some fabrics over time.
- Choose heat-tolerant materials like faux wood, aluminum mini blinds, or quality roller shades.
- Keep fabric off the heat source and avoid puddled curtains.
Trim that is not square (hello, old houses)
My house has at least one window that is basically a parallelogram. If your bay has out-of-square sections:
- Use outside-mount shades for the most forgiving look.
- If you must inside mount, accept small gaps and prioritize level installation.
Troubleshooting angled bay window treatment problems
Curtains do not slide around the corners
- Check that corner connectors are aligned and fully seated.
- Make sure a bracket is not pinching the joint.
- Switch from rings to a traverse track if you want truly smooth travel.
There is a light gap between treatments at the angles
- For shades: consider outside-mount on the side windows, or choose a shade with a slightly wider fabric allowance if available.
- For curtains: add return panels at the ends or use a rod that wraps back toward the wall.
Shades rub the frame when raising or lowering
- Confirm the headrail is level.
- Re-check inside-mount width. If it is too tight, it will bind.
- Look for trim lips or paint buildup, especially in older homes.
The bay feels colder after you add treatments
This sounds backward, but if you install thick drapes and block a heat register or trap condensation against cold glass, the area can feel chilly. If you notice winter moisture, take a look at why windows sweat in winter and how to stop it.
My practical recommendations (if you want the quick answer)
- Best all-around look: continuous rod or track with drapes, mounted high and wide.
- Best daily function: individual inside-mount cellular or roller shades on each section.
- Best for harsh sun with a view: solar shades on each section, plus stationary drape panels for softness.
- Best for budget and simplicity: matching individual rods per section or simple roller shades per window.
If you want more ideas for this room category, browse the rest of our window treatment guides here: Window Treatments.
FAQ
Do I need custom treatments for an angled bay window?
Not always. Off-the-shelf shades work great if each window section is a standard size. Curtains can be standard panels too. The part that often needs “bay specific” hardware is the rod or track if you want one continuous run.
Is it better to mount inside the trim or above it?
For shades, inside mount looks clean and keeps things tidy. For curtains, mounting above and wider than the trim usually looks more polished and makes the bay feel larger.
Can I hang one long curtain across the entire bay?
You can, but it is usually a frustration unless you use a track designed to glide around corners. A standard straight rod will not do it. If you want curtains to open and close across the whole bay, plan on a bay rod kit or a corner-capable track.