

I grew up holding the flashlight while my grandpa coaxed old windows back to life. Years later, in my own 1970s split-level, I met the same problem in a different outfit: double-hung windows that would not stay up, cords snapped somewhere deep in the frame, and paint everywhere like it was applied with a mop.
If you have an older, weight-and-pulley double-hung window (common in historic homes), replacing sash cords is one of those repairs that looks mysterious until you see the parts. After that, it is just careful steps, good knots, and a little respect for heavy cast-iron weights that are very good at smashing fingers.
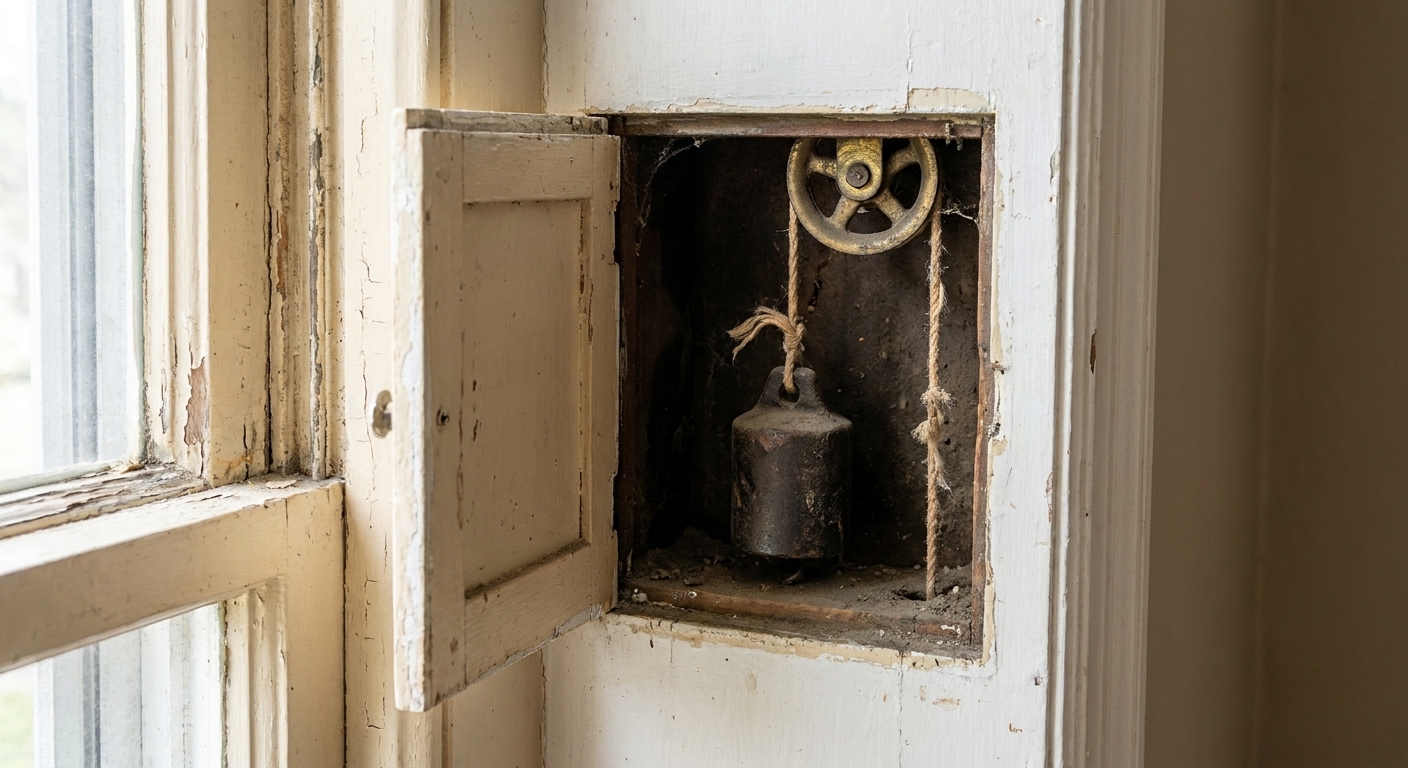
How to tell if you have weights and sash cords
This guide is for traditional wood double-hung windows that use hidden weights inside the side jambs.
- Look for pulleys: At the top left and right of the side jambs, you may see a small brass or steel wheel (pulley) set into the wood.
- Listen for weights: Tap the side jamb. A hollow sound often means there is a weight pocket behind it.
- Look for an access door: Many windows have a small rectangular door (often painted shut) low on each side jamb. That is the weight pocket cover.
If your window has spring balances (metal tracks or coils) instead, stop here. Different system, different repair.
Safety first (seriously)
Window weights are heavier than they look. A lot of them land in the 5 to 15 pound range each, and big sashes can be heavier than that. If a cord slips, that weight can drop like a hammer inside the pocket.
- Wear safety glasses.
- Wear gloves if the edges of the pocket door or pulleys are rusty.
- Keep one hand controlling the cord anytime a weight is hanging free.
- Work with the sash supported. A sash can fall and shatter glass.
Lead paint note: If this window has decades of paint on it, assume some of it could be lead. Avoid dry sanding. Score paint lines with a sharp knife, work slowly, and clean up dust and chips carefully.
If your window is painted shut or binding badly, free it up first so you are not forcing parts. I walk through safe ways to do that here: How to Unstick a Painted or Swollen Double-Hung Window.
Tools and materials
Tools
- Flat pry bar or stiff putty knife
- Utility knife
- Small hammer
- Screwdriver (flat and Phillips)
- Pliers
- Measuring tape
- Step stool
- Spring clamps or painter’s tape (to hold cords temporarily)
Materials
- Cotton sash cord (traditional) or sash chain (less common)
- Replacement screws for pocket doors if originals are stripped
- Wax or dry lubricant for the pulleys (optional but nice)
- Wood filler and paint if the pocket door gets chewed up (optional)
Cord sizing tip: Many old windows use cord around 1/4 inch diameter, but the real rule is simple: it needs to ride smoothly in the pulley groove without wedging or jumping out. Bring a piece of the old cord (if you have it) to match.
Know your parts
- Sash: The moving window panel. The bottom sash moves up, the top sash moves down.
- Pulley: The wheel at the top of the jamb.
- Sash cord: Rope connecting sash to weight.
- Weight pocket: Hollow cavity inside the side jamb where the weight travels.
- Pocket door: Small access panel to reach the weight.
- Parting bead: Thin vertical strip that separates the two sashes.
- Stop molding (interior stop): Trim that holds the bottom sash in place.
Step 1: Remove the bottom sash
Most cord jobs are easiest with the sash out. Take your time here. The goal is to preserve old wood, old glass, and your patience.
- Score paint lines: Use a utility knife to score along the edges of the interior stops where they meet the jamb and stool. Old paint acts like glue.
- Gently pry the interior stops: Slip a putty knife in first to start a gap, then use a small pry bar. Work in small bites to avoid snapping the stop.
- Pull the bottom sash toward you: Once stops are off, the bottom sash should tilt inward and lift out.
- Deal with the cords: If cords are intact but frayed, tie a temporary knot or clamp them so weights do not fall. If cords are broken already, do not worry. We will fish them out from the pocket.
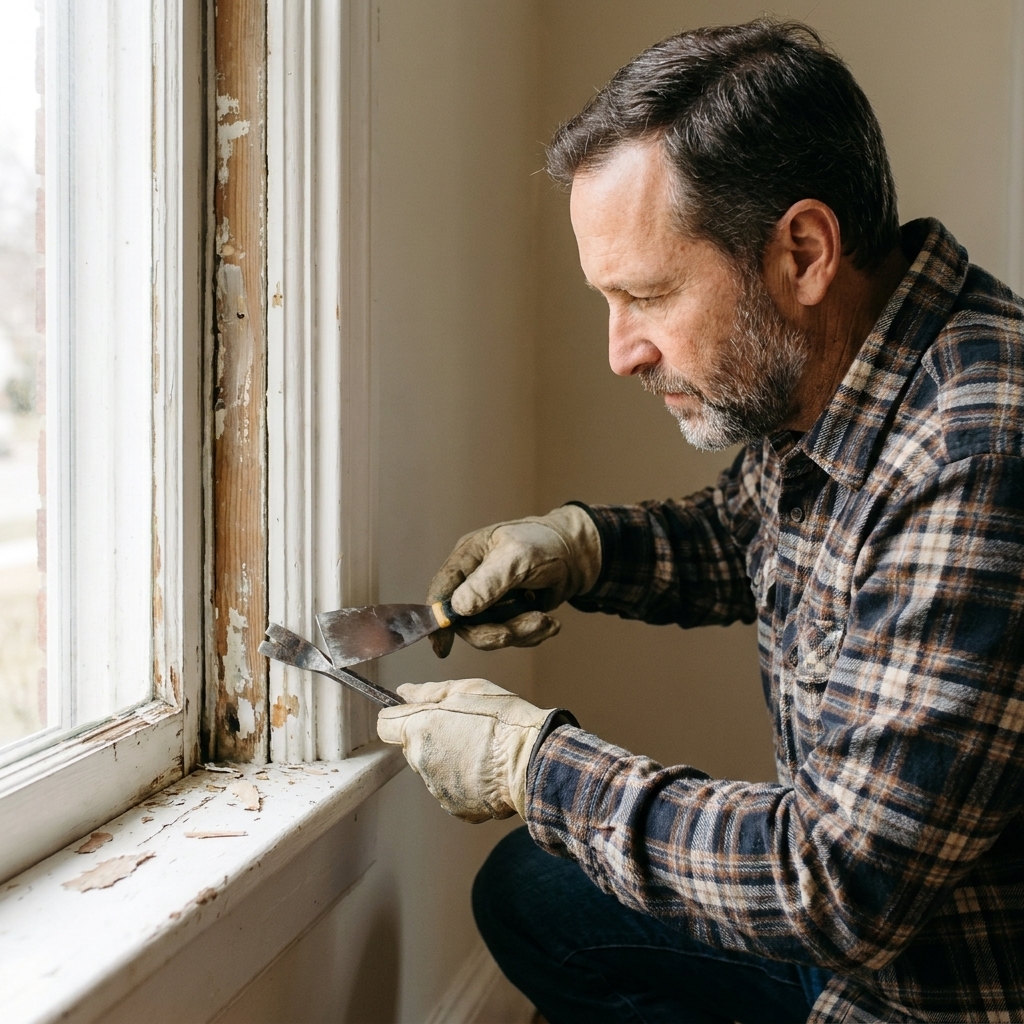
Labeling trick: I like a piece of painter’s tape on each stop labeled left and right, plus an arrow for up. Old wood trim tends to fit back best exactly where it came from.
Step 2: Open the weight pocket
The weight pocket door is usually low on each side jamb. In many historic homes it is painted over so well you will swear it is not there.
- Find the outline: Look for a faint rectangle or nail heads. Run your fingers along the jamb and you may feel the seam.
- Score the perimeter: Use a utility knife to cut through the paint at the seam. Do this a couple passes. This prevents peeling paint and splintering.
- Pry carefully: Start at a corner with a stiff putty knife, then gently pry the door open. Some doors swing out on a screw, some lift off, some are just friction fit.
If there is no door: Some windows require removing a section of the interior casing or a thin cover board. That is still doable, but it is more carpentry and patching. If you are trying to preserve original trim, consider stopping and reassessing.
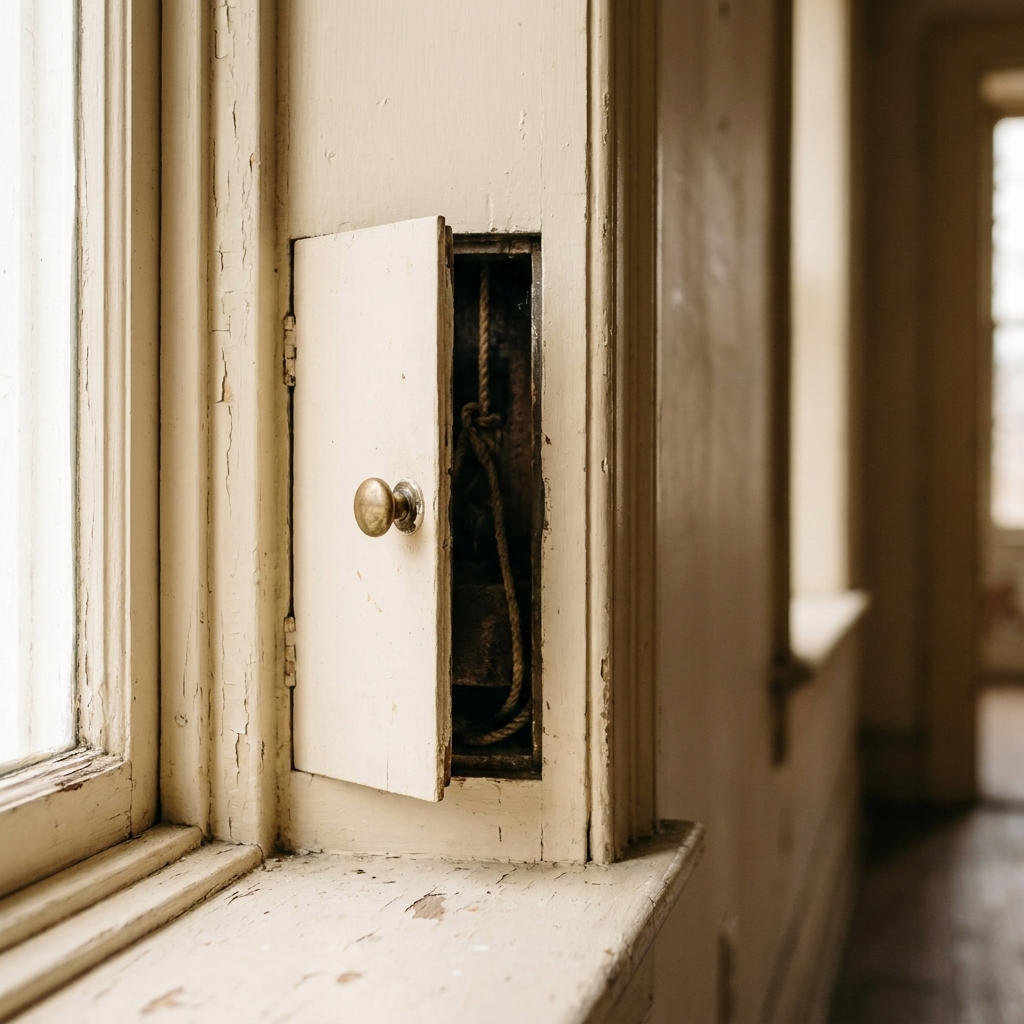
Step 3: Retrieve the weight and old cord
- Reach in and find the weight: If the cord snapped, the weight is probably sitting at the bottom of the pocket.
- Pull the weight up slowly: Get a solid grip and bring it out through the door opening.
- Remove old cord remnants: There is usually a knot, a metal ring, or a hole through the weight where the cord attaches.
Do not let the weight free-fall back into the pocket. Set it down or hold it while you prep the new cord.
Step 4: Check the pulley
This takes two minutes and can save your new cord. Before you run anything, look at the pulley like it is guilty until proven innocent.
- Spin the wheel: It should turn freely. If it is stuck with paint, carefully scrape paint off the wheel edge and the groove.
- Check for wobble: Tighten loose screws so the pulley does not cant sideways and chew cord.
- Feel for sharp edges: Burrs, cracks, and sharp pulley lips can saw through cord fast. If you feel a sharp edge, smooth it carefully.
Quick tune-up: A tiny dab of wax or a dry lubricant helps if the pulley squeaks. Avoid oily sprays that attract dust inside the pocket.
Step 5: Cut the cord length
Here is my no-math method, plus a backup if your old cord is gone.
No-math method (best if you have an old cord)
- Use the old cord as a template: If you have a cord from the other side that is still intact, pull the weight out and lay that cord straight. Cut your new cord to match, then add 12 to 18 inches extra.
- No intact cord: Tie the new cord to the weight, then run it over the pulley. With the weight hanging just a few inches below the pulley, mark the cord at the sash attachment point and add 12 to 18 inches.
The extra length is intentional. It gives you room to re-tie if your first knot lands wrong. You can always trim after the sash knot is seated.
Step 6: Tie the cord to the weight
Old-school cotton sash cord is smooth, which is good for pulleys but bad for weak knots. You want something bulky and dependable.
Good options
- Figure-eight follow-through (secure and tidy)
- Bowline (classic loop knot that is easy to untie later)
- Double overhand stopper through a weight hole (simple and chunky)
My go-to: If the weight has a hole, I pass the cord through and tie a double overhand stopper on the end. If it has an eye or ring, I use a bowline so the loop sits neatly.
Once tied, give it a few hard tugs. Better to find out now than after everything is reassembled.
Step 7: Run the cord over the pulley
- Feed the free end up inside the pocket: Guide it toward the pulley opening.
- Run it over the pulley: Depending on access, you may do this from the top jamb opening or from inside the pocket.
- Lower the weight gently: Let it travel down into the pocket while you keep light tension on the cord.
- Temporarily secure the cord: Clamp it to the jamb or tape it so the weight does not drop while you work on the other side.
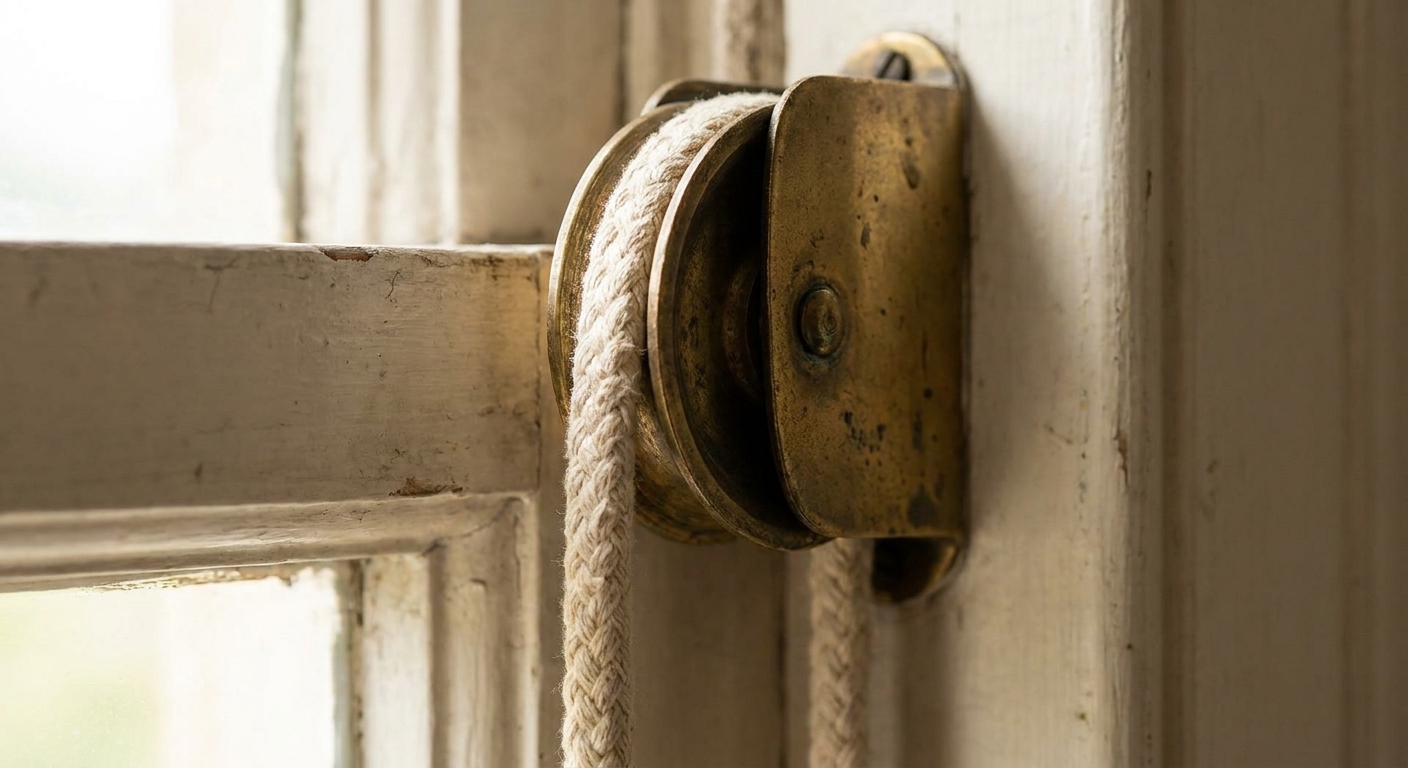
If the cord will not reach the pulley
If the pocket is tight and your fingers cannot guide the cord, make a simple leader. Tie a small nut, washer, or a set of keys to a thin string, drop it down from the pulley opening, grab it through the pocket door, then use that string to pull your sash cord up and over.
Step 8: Attach the cord to the sash
Most bottom sashes have a cord groove or a side mortise where the knot sits.
- Find the attachment point: Look along the side of the sash for a small pocket or hole where the cord ends.
- Set the sash at the right height: A good starting point is with the sash roughly level with the sill (as if it were closed). Keep it supported on a padded surface.
- Pull the cord taut and mark it: You want the weight to hang a little above the bottom of the pocket when the sash is fully closed, not slam the bottom.
- Tie the sash knot: Use a bulky knot that cannot pull through, then trim the tail but leave at least 1 inch.
- Repeat for the other side: Try to match cord lengths so the sash hangs level.
Common mistake: Tying one side shorter than the other. The sash will rack, bind, and chew up the jamb. If the sash looks crooked, fix the lengths now before reinstalling stops.
Step 9: Reinstall and test
- Set the sash back into the jamb: Tip it in, then lower it into its tracks.
- Test balance before stops: Raise the sash halfway and let go. A properly weighted sash should stay put or drift slowly, not drop like a guillotine.
- Test full travel: Run the sash from fully closed to fully open. Listen for scraping, and confirm both knots are seated where they belong.
- Reinstall interior stops: Nail or screw back in place carefully. Do not pinch the sash. Leave a hairline gap so it moves freely.
- Close up the pocket door: Re-secure it so it does not rattle, and so curious fingers do not find the weights.
If your window still does not behave, the problem is usually one of these: cord length mismatch, weights mismatched, pulleys sticking, or paint and swollen wood causing friction. This friction issue is extremely common. Again, this guide helps: How to Unstick a Painted or Swollen Double-Hung Window.
Top sash and parting bead
This walkthrough focuses on the bottom sash because that is where most people notice failure first. If your top sash also has cords and will not stay up, the process is basically the same, but you have one extra layer to remove.
- You will need to remove the parting bead (the thin strip between sashes) to get the top sash out.
- Go slow: Parting beads are easy to split, and old paint glues them in place. Score both edges with a knife, then pry in small steps with a putty knife.
- Label it: Just like stops, parting beads tend to fit best back in their original groove.
Once the top sash is out, you replace cords exactly like you do for the bottom sash, then reinstall the parting bead and finally the bottom sash and interior stops.
What if the weights are missing or mismatched?
I see this a lot in old houses that have been “updated” over the decades. Someone removed weights during a storm window install, or swapped sashes around so the weights no longer match.
How to check weight match
- Bathroom scale method: Carefully weigh the sash (remove it and place it on a scale). As a starting point, aim for the two weights combined to be roughly equal to the sash weight. Then fine-tune for your window’s friction and how you want it to feel.
- Stamp marks: Some cast weights are stamped with numbers (pounds). Do not rely on this alone, but it helps.
Practical DIY approach: If the sash will not stay up, the weights are likely too light or bottoming out. If it shoots up, they are likely too heavy. Small adjustments can be made by swapping weights between windows of the same size, but be methodical and label what came from where.
When to stop and get help
Replacing cords is a great DIY job. Full window restoration can get complicated fast. Consider calling a pro if:
- The sash has broken glass or loose glazing that is crumbling.
- The jamb is split, severely rotted, or the pulleys are missing entirely.
- You suspect lead paint and you are disturbing large areas of it.
If you are balancing preservation and performance, I wrote about making smart replacement decisions without losing the soul of the house here: Historic Home Window Replacement Without Losing Character.
Fast troubleshooting
The sash drops as soon as I let go
- One cord is tied too long, so one weight is bottoming out.
- A weight is missing or too light.
- The cord is slipping at the sash knot.
The sash is hard to move
- Pulley is stuck or packed with paint.
- Jamb edges or parting bead are painted shut.
- Sash is swollen from moisture.
The sash moves but will not stay level
- Cords are different lengths.
- One weight is heavier than the other.
Small upgrades after the fix
Once your sash actually stays where you put it, you will notice the next weak links: drafts and rattles. Before you jump to replacement, simple air-sealing can make a huge comfort difference.
- For draft control, start here: Weatherstripping vs. Caulking for Drafty Windows.
- If you are chasing winter condensation, this is worth a read: Why Windows Sweat in Winter and How to Stop It.
FAQ
Should I use cotton sash cord or synthetic?
For historic windows, cotton sash cord is traditional, easy to work with, and runs quietly over pulleys. It is still smooth enough that sloppy knots can slip, so use a proper stopper knot or a bowline and tug-test it hard. Some synthetics last longer but can be slicker to knot and may not play as nicely with older pulleys.
Do I need to replace both cords if only one broke?
I do. If one cord failed from age and friction, the other is usually not far behind. Replacing both saves you from opening the pocket again in two months.
Can I replace cords without removing the sash?
Sometimes, but it is much harder to tie and set lengths accurately. If you are already opening the pocket, pulling the sash gives you visibility and control.
My pocket door is stuck under thick paint. What is the safest way to open it?
Score the seam repeatedly with a sharp utility knife. Then work a stiff putty knife into the cut and slowly pry. If paint is bridging across onto surrounding trim, take more time scoring so you do not peel big flakes off the casing.